
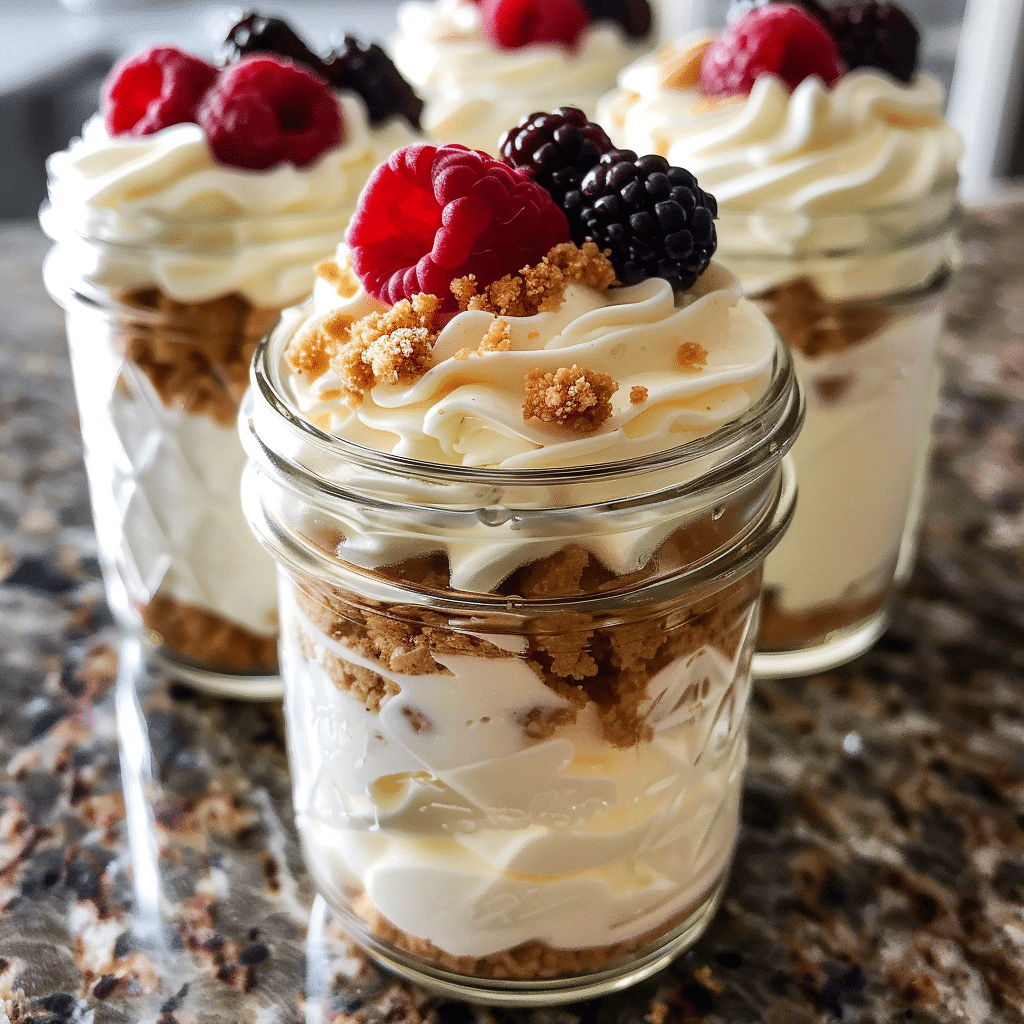
There is a category of recipe that every home cook needs — the one that looks impressive, tastes extraordinary, and requires almost no effort or skill to pull off. No-Bake Cheesecake Jars are the definition of that category. Individual jars of buttery graham cracker crust topped with a silky, airy, perfectly sweetened cheesecake filling that is light enough to eat the whole jar and rich enough to feel like a genuine indulgence. No oven, no water bath, no cracking, no anxiety — just mix, layer, chill, and top with whatever looks good in your kitchen.
Make them for a dinner party, a summer gathering, date night at home, or a quiet Friday evening when you deserve something that feels special without requiring much from you.
Why You’ll Love This Recipe
- No oven required — Zero baking, zero water bath, zero risk of cracking — just mix, layer, and refrigerate for one of the most stress-free impressive desserts you can make.
- Individually portioned and endlessly cute — Individual jars are the perfect party dessert format — easy to serve, easy to transport, and they look genuinely beautiful presented on a table.
- Make ahead is built in — These jars are best made the night before, which makes them the ideal entertaining dessert when you want everything done before guests arrive.
- Completely customizable — Fresh strawberries, blueberry compote, caramel drizzle, lemon curd, chocolate ganache — the filling is the perfect neutral canvas for virtually any topping you love.
Ingredients You’ll Need
For the Graham Cracker Crust:
- 1 cup (100g) graham cracker crumbs
- 2 tablespoons (28g) unsalted butter, melted
For the Cheesecake Filling:
- 8 oz (226g) full-fat brick cream cheese, softened to room temperature
- ⅓ cup (65g) granulated sugar
- 2 tablespoons (30g) sour cream, room temperature
- 1 teaspoon fresh lemon juice
- ½ teaspoon pure vanilla extract
- 1 cup (240ml) heavy cream, cold
Tip: You’ll find the full list of ingredients and measurements in the recipe card below.
Let’s Get Started
- Make and press the crust. Combine the graham cracker crumbs and melted butter in a bowl and stir until every crumb is coated and the mixture holds together when squeezed — it should look and feel like damp sand. Divide the mixture evenly among your jars and press it firmly into the base of each one using the back of a small spoon or the bottom of a narrow glass. A firmly pressed crust holds together when scooped through with a spoon rather than crumbling and mixing into the filling. Place the jars in the refrigerator to chill and firm while you make the filling.
- Beat the cream cheese base. Make sure your cream cheese is genuinely at room temperature before starting — this is the single most important factor in a smooth, lump-free filling. Cold cream cheese no matter how long you beat it will leave small lumps that never fully incorporate. Beat the softened cream cheese, granulated sugar, sour cream, fresh lemon juice, and vanilla extract together on medium speed for a full 2 minutes until the mixture is completely smooth, fluffy, and has increased slightly in volume. Scrape down the sides and bottom of the bowl and beat for another 30 seconds to catch any unincorporated spots.
- Whip the heavy cream to stiff peaks. In a separate bowl — chilled in the freezer for 5 minutes if possible — beat the cold heavy cream on medium-high speed until it reaches stiff peaks that stand straight up when the beaters are lifted and hold their shape without drooping. Cold cream whips faster and holds its peaks better than cream at room temperature. Do not overbeat past stiff peaks or the cream will begin to look grainy and separated.
- Fold together carefully. Add approximately one third of the whipped cream to the cream cheese mixture and fold gently with a large spatula to lighten the base. Add the remaining whipped cream in one addition and fold with slow, deliberate sweeping motions from the bottom of the bowl up and over the top until no white streaks remain. This gentle folding technique is what preserves the airy, mousse-like texture — aggressive stirring deflates the whipped cream and produces a denser, heavier filling.
- Fill the jars. Transfer the cheesecake filling to a large piping bag fitted with a round tip, or simply use a zip-lock bag with one corner snipped off. Pipe or spoon the filling generously over the chilled graham cracker crust in each jar, filling them to just below the rim to leave space for toppings.
- Chill before serving. Cover each jar with a lid or plastic wrap and refrigerate for at least 2 hours — the filling firms and sets during this time into a beautifully sliceable, spoonable texture. Overnight refrigeration is even better and makes the jars even easier to serve with clean, defined layers visible through the glass.
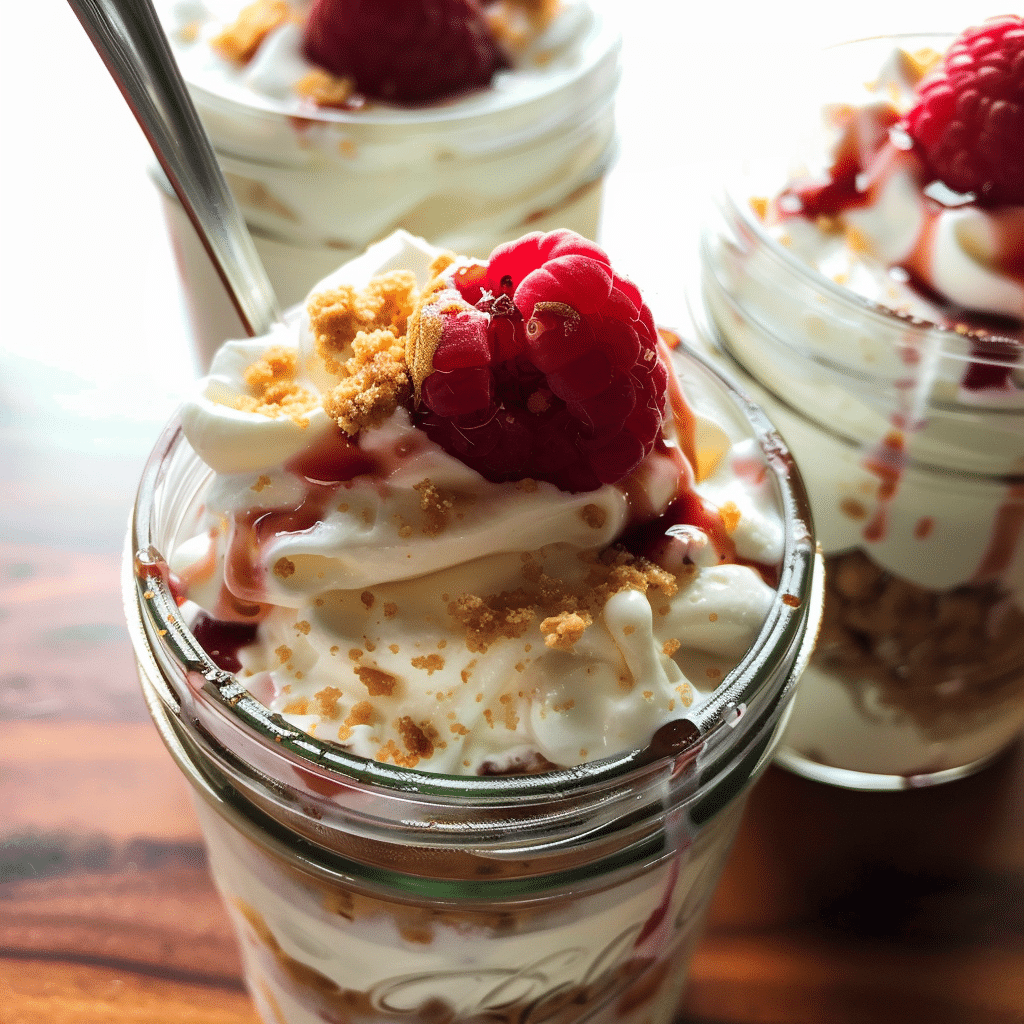
- Top and serve. Add your chosen toppings immediately before serving — fresh berries, a spoonful of fruit compote, a drizzle of caramel or chocolate sauce, or a dollop of lemon curd. Serve cold directly from the refrigerator.
Servings and Pairing
This recipe fills 4 generous jars or 6 smaller ones depending on jar size. No-Bake Cheesecake Jars pair beautifully with a hot cup of coffee, a glass of sparkling rosé, or a simple herbal tea for a light and elegant dessert course after any meal.
Variations
Strawberry Shortcake Version
Layer fresh sliced strawberries and a spoonful of strawberry compote between the crust and filling and top with more fresh strawberries and a small piece of whipped cream for a strawberry shortcake-inspired jar that is stunning in summer.
Chocolate Version
Add 3 tablespoons of sifted cocoa powder to the cream cheese mixture before folding in the whipped cream for a rich chocolate cheesecake filling. Top with chocolate ganache and a sprinkle of sea salt for a deeply indulgent version that chocolate lovers will completely obsess over.
Lemon Version
Increase the lemon juice to 2 tablespoons and add the zest of one full lemon to the cream cheese mixture for a bright, citrusy filling. Top with store-bought or homemade lemon curd and a small sprig of fresh mint for an elegant, refreshing jar that is perfect for spring and summer entertaining.
Storage Tips
- Fridge: Store covered jars without toppings for up to 4 days. The filling stays perfectly set and creamy throughout — add fresh toppings just before serving each time.
- Freezer: Freeze the filled jars without toppings for up to 1 month. Thaw overnight in the refrigerator and add toppings fresh before serving. The texture is very good after freezing — slightly denser but still creamy and delicious.
- Transport: These jars travel beautifully to picnics, potlucks, and parties — seal with lids, keep in a cooler, and add toppings on arrival for the freshest possible presentation.
FAQs
Why is my cheesecake filling lumpy?
Almost always the cause is cream cheese that was not fully at room temperature before beating. Even slightly cold cream cheese will not beat smooth regardless of how long you mix it. Leave it on the counter for at least 1 hour before starting — in a warm kitchen, 45 minutes is usually sufficient. If you notice lumps early, stop and allow the mixture to warm slightly before continuing to beat.
Can I use whipped topping instead of heavy cream?
Yes — fold in 1.5 cups of thawed whipped topping instead of whipping the heavy cream yourself for a slightly lighter, less rich filling that still sets beautifully in the jar. The flavor is slightly less complex than real whipped cream but the convenience makes it a popular and totally acceptable shortcut.
What size jars work best?
8 oz wide-mouth mason jars are the most popular choice and produce beautifully proportioned individual servings with clear visible layers. 4 oz jars work for smaller, bite-sized portions that are perfect for large parties and dessert tables. Any clear glass jar or cup with a wide enough opening to layer and serve easily will work well.
Final Thoughts
No-Bake Cheesecake Jars are the kind of recipe that becomes a permanent part of your entertaining toolkit from the very first time you make them. Effortless, beautiful, and genuinely delicious in a way that impresses every single person who eats one — they are the dessert you reach for whenever you want something special without the stress. Make a batch tonight and discover just how good no-bake can be!
No-Bake Cheesecake Jars
- Total Time: 2 hours 20 minutes
- Yield: 6 servings
- Diet: Vegetarian
Ingredients
For the Graham Cracker Crust:
- 1 cup (100g) graham cracker crumbs
- 2 tablespoons (28g) unsalted butter, melted
For the Cheesecake Filling:
- 8 oz (226g) full-fat brick cream cheese, softened to room temperature
- ⅓ cup (65g) granulated sugar
- 2 tablespoons (30g) sour cream, room temperature
- 1 teaspoon fresh lemon juice
- ½ teaspoon pure vanilla extract
- 1 cup (240ml) heavy cream, cold
Toppings of choice: fresh berries, fruit compote, caramel sauce, chocolate ganache, lemon curd
Instructions
- Make the crust. Combine the graham cracker crumbs and melted butter in a bowl and stir until the mixture resembles wet sand and holds together when pressed. Divide evenly among the jars and press firmly into the base of each one using the back of a spoon or the bottom of a small glass. Refrigerate while you make the filling.
- Beat the softened cream cheese, granulated sugar, sour cream, lemon juice, and vanilla extract together in a large bowl on medium speed for 2 minutes until completely smooth, fluffy, and lump-free. Scrape down the bowl and beat once more to ensure no lumps remain.
- In a separate cold bowl, beat the cold heavy cream on medium-high speed until stiff peaks form — the cream should hold its shape firmly when the beaters are lifted.
- Fold the whipped cream into the cream cheese mixture in two additions using a large spatula and gentle sweeping motions from the bottom of the bowl upward. Fold until just combined and no white streaks remain — do not stir aggressively or the filling will lose its airy, mousse-like texture.
- Transfer the cheesecake filling to a piping bag or zip-lock bag with the corner snipped. Pipe or spoon the filling generously over the chilled graham cracker crust in each jar.
- Cover the jars and refrigerate for at least 2 hours before serving — overnight is even better for a firmer, more set filling.
- Add toppings just before serving and enjoy cold.
Notes
- The cream cheese must be fully softened to room temperature before beating — cold cream cheese creates lumps that do not smooth out and result in a grainy filling.
- The heavy cream must be cold when whipped — warm cream will not reach stiff peaks and the filling will be too soft to hold its shape in the jar.
- Add toppings immediately before serving rather than in advance — fresh fruit releases juice over time and can make the top of the filling watery if added too early.
- Prep Time: 20 mins
- Chilling Time: 2 hours
- Cook Time: 0 mins